How to Kitchen Remodel: Scope, Budget, Permits and Build
Learn how to kitchen remodel step by step, from scope and budget to permits, construction and final inspection, with realistic cost and timeline ranges.
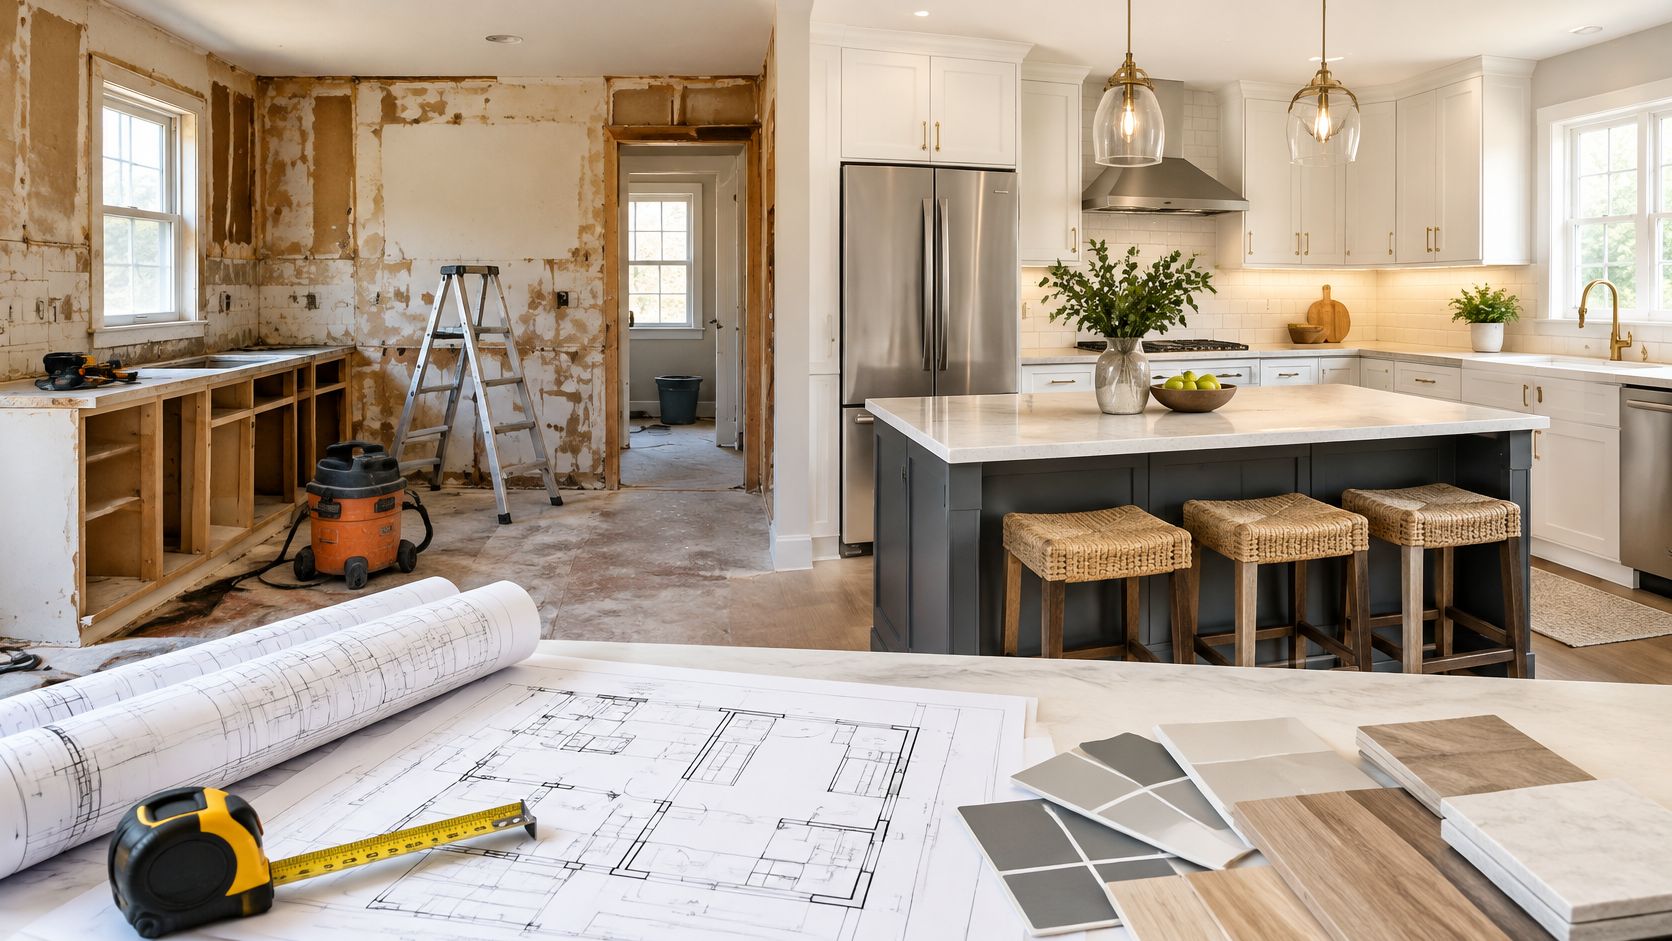
The top 10% of kitchen remodel spenders invested at least $180,000, three times the $60,000 median for major kitchen renovations reported in the 2025 Houzz U.S. Kitchen Trends Study. That spread is the central lesson in how to kitchen remodel well. Finish choices matter, but scope decides whether a project stays near the middle or moves into the high-cost tail. For San Jose and Bay Area homeowners, the safest sequence is simple. Define scope first, measure second, price third, and don't demolish until permits, systems, and long-lead selections are settled.
Choose Your Remodel Scope Before You Budget
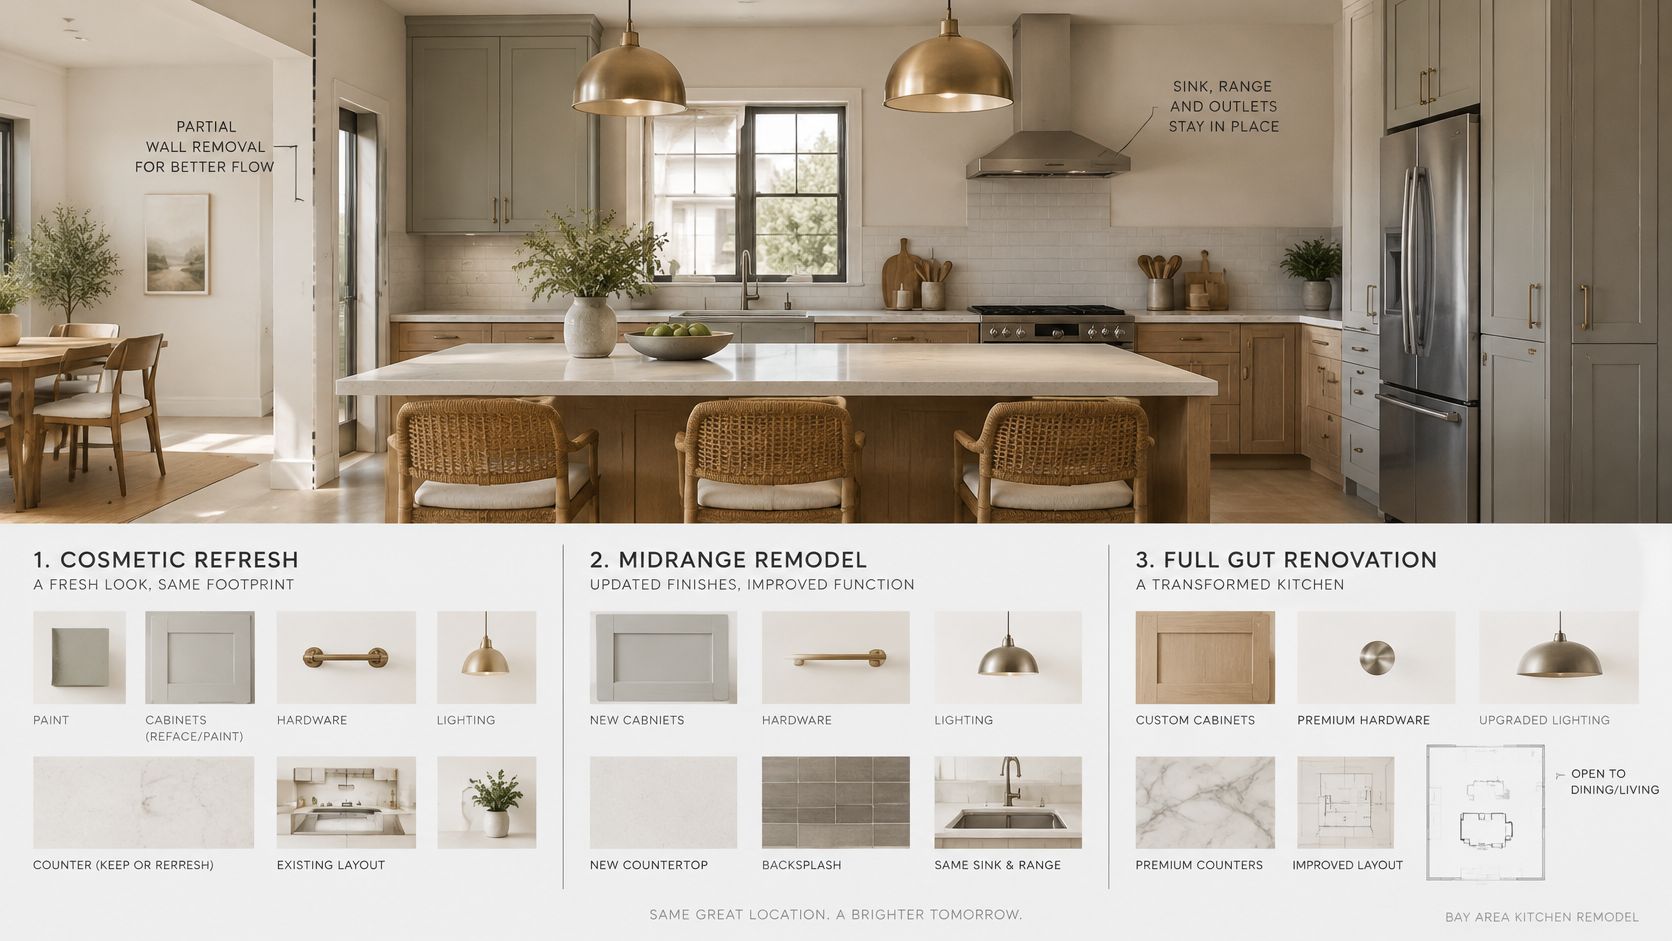
Every kitchen scope lands in one of three tiers: cosmetic refresh, partial renovation, or full reconfiguration. Naming the tier early prevents the most expensive mistake in remodeling, which is budgeting for paint and cabinet faces while designing a project that moves plumbing, wiring, and ventilation.
The trap is that the trigger often looks cosmetic. Swapping a recirculating hood for a ducted one adds an exhaust route. Relocating an outlet to feed an island adds wiring work. Either change can pull a project out of the first tier and into permit territory.
| Scope tier | What changes | Reference cost point | Permit outlook |
|---|---|---|---|
| Cosmetic refresh | Cabinet faces, hardware, paint, lighting; sink, range and outlets stay put | $20,000 median for minor projects | Often none for finish-only work; confirm with the city |
| Partial renovation | New cabinets and counters; appliances swapped in place; some new outlets or hood | $55,000 median for major projects | Likely electrical or mechanical permit; confirm with the city |
| Full reconfiguration | Walls moved, sink or range relocated, island added, new exhaust route | $55,000 median and up; high-end scopes run far higher | Likely; structural review if a wall is removed |
The medians in that table come from the 2026 U.S. Houzz Kitchen Trends Study, which reported $20,000 for minor kitchen projects, $55,000 for major ones, and 68% of renovating homeowners replacing all of their cabinets.
What the Reference Numbers Measure
A median is a midpoint across thousands of projects, markets, and finish levels. It describes the range, and a real bid moves away from that midpoint based on labor rates, permit fees, and the condition of the existing kitchen.
The cabinet figure carries a scheduling lesson. Cabinetry sits at the center of cost and sequence because cabinet dimensions drive appliance openings, countertop templating, electrical placement, and flooring transitions. Lock cabinet selections early and the rest of the job lines up behind them.
For a narrower scope, the 2024 Cost vs. Value Report published by Zonda and JLC put a midrange minor kitchen remodel at an average job cost of $27,492, with 96% recouped at resale. That figure prices one defined scope. A bigger kitchen with layout changes will land elsewhere.
Practical rule: A national median frames the range. A bid prices one house, one layout, and one set of selections.
The tier also decides drawings, permit path, construction sequence, temporary kitchen needs, and reserve size. A cosmetic refresh may need only product selections and finish scheduling. A full reconfiguration needs dimensioned plans, trade coordination, inspections, and a larger contingency because more concealed conditions get exposed.
Use a plain test before requesting prices. If a wall, sink, gas line, electrical panel, or exhaust duct moves, the project belongs in the partial or full tier. Build the budget on that basis, even if the visible finishes look modest.
How to Plan the Layout and Measure First
Good layout work starts with the room as it exists, not with a cabinet catalog. Follow these steps in order.
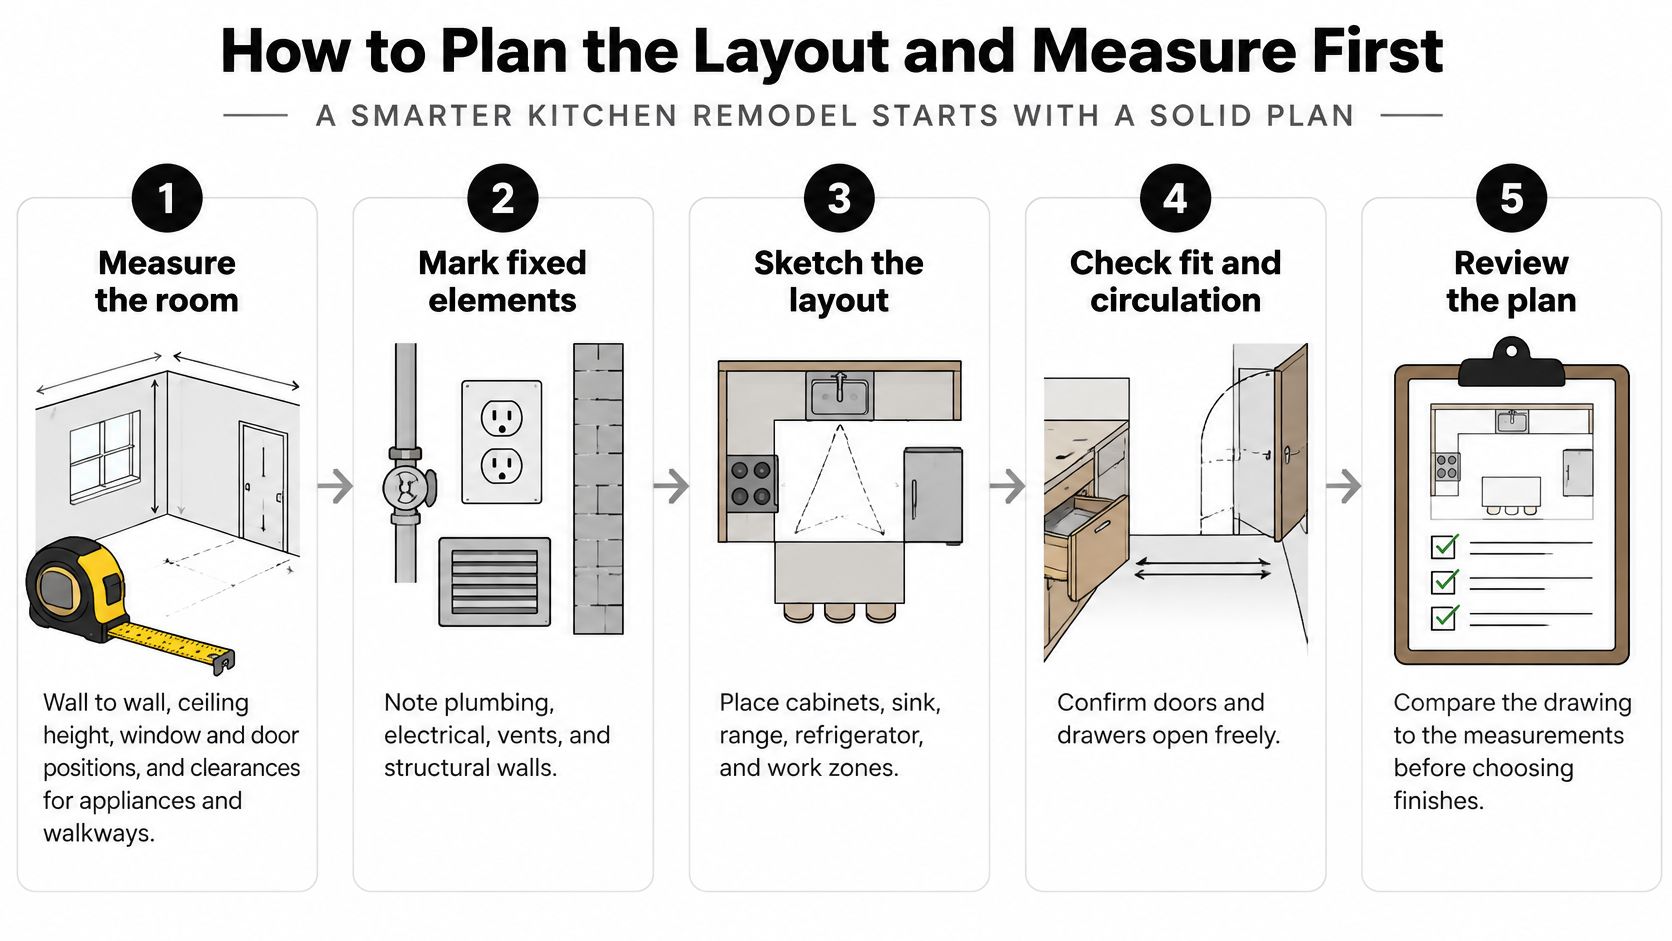
- Measure the room. Record wall-to-wall dimensions, ceiling height, and window and door positions. Add clearances for refrigerator and dishwasher door swings, because a layout that fits on paper can still block a walkway.
- Map utilities. Mark water supply and drain locations, any gas line, electrical panel location and spare capacity, and a rough exhaust path to the exterior. The usual slip is placing an island sink or range before checking whether drains, vents, and circuits can reach it.
- Note concealed risks. Look for staining under the sink, soft subfloor near the dishwasher, cracked tile patterns, and walls that may carry load from above. These observations don't confirm hidden damage, but they tell a contractor where to investigate before pricing.
- Draw three layout options. Compare the work triangle, meaning the walking path between sink, range, and refrigerator, plus storage, counter landing space, and island seating. This comparison step is covered in a guide to designing a kitchen layout for homeowners weighing those trade-offs.
- Freeze one layout in writing. Don't order cabinets or appliances before the layout is fixed. A one or two inch measurement error can appear as a gap at the end of a cabinet run, and a layout change after rough-in means moving wiring and pipes again.
- Make preliminary selections. Choose the cabinet line, countertop material, range type, sink style, and hood type. Selections affect rough-in heights, electrical loads, and duct size, so they belong before demolition, not during it.
What a Finished Plan Contains
A usable plan includes a dimensioned floor plan, cabinet elevations, a utility schedule, appliance specifications, and a written scope stating what remains and what gets replaced. Elevations are straight-on drawings of each wall. They show cabinet heights, outlet locations, hood position, and tile extents.
9Builders always presents at least three layout options so the homeowner can compare trade-offs between bedroom separation, kitchen size, and storage. That comparison matters when a kitchen expansion takes space from a dining or living area. Homeowners deciding whether wall removal is worth it can review the open-concept kitchen remodel guide before committing to structural work.
A frozen layout protects every later decision. Cabinets, counters, circuits, and ducts all reference the same drawing.
Budgeting for Cabinets, Labor and Surprises
The overruns that hit hardest come from changes that look cosmetic: a recirculating hood swapped for an exterior-vented one, an outlet added to the island, a fixture moved a few feet. Each of those pulls ducting, wiring, or permit work behind it. A kitchen budget works as a set of lines rather than one total, because a single number hides the items most likely to move.
| Budget line | What it covers | How to estimate | Watch for |
|---|---|---|---|
| Design and drawings | Measured plans, layout, elevations and permit drawings | Fixed quote per scope tied to number of plan sheets and revisions | Redrawing after layout changes |
| Cabinets and countertops | Cabinet boxes, doors, hardware, countertop fabrication and templating | Quoted by product line and confirmed cabinet list | Lead times and template timing |
| Labor and subcontractors | Demolition, framing, electrical, plumbing, HVAC, drywall, paint, flooring | Trade-by-trade bids tied to the written scope | Hidden repairs found after opening walls |
| Permits and fees | Plan review, building, electrical, plumbing and mechanical permits | Fee schedule from the city or county where the house sits | Re-review after scope changes |
| Appliances and fixtures | Range, hood, dishwasher, faucet and lighting | Selected product prices with model numbers | Hood ducting and added electrical needs |
| Contingency | Reserve for concealed conditions | Written percentage or dollar reserve held separately | Older wiring, moisture, structural surprises |
| Living-through costs | Temporary kitchen, meals, dust control, storage | Homeowner estimate based on expected duration | Longer duration when schedules slip |
The national reference point most often quoted is $60,000, the 2024 median spend for a U.S. kitchen remodel reported in Houzz's 2025 U.S. Kitchen Trends Study. The $55,000 median cited for major projects uses a narrower scope definition, so the two figures measure different remodel populations rather than disagreeing. Both combine homes of different sizes and scopes. Treat them as context, not as a target. Ask for a line-item estimate instead of a single price, and ask what is excluded.
Before locking the total, check what the spend returns. 9Builders' Remodel ROI Calculator is free and estimates how much value a remodel adds to a Bay Area home, which helps when deciding how much scope the budget should carry.
Contingency and Allowances
Contingency is a written reserve for concealed conditions: outdated wiring, moisture in the subfloor, or undersized framing found after demolition. I recommend holding 10 to 20 percent of the construction budget as a separate line, sized to the house rather than applied as a flat rule. Older homes, where wiring and framing may not have been opened in decades, more often land at the upper end. The right number follows what inspection of the actual house shows.
An allowance is different. It is a placeholder amount for tile, fixtures, or lighting that has not been selected yet. If chosen products cost more than the allowance assumes, the budget rises. Record the product tier behind each allowance in writing. A tile allowance based on basic ceramic will not cover handmade tile, and that gap should be visible before signing.
Check exclusions line by line. Permit fees, utility upgrades, appliance delivery, debris removal, and final cleaning are often listed separately. The exclusions that hurt most are the ones attached to small scope changes, like the duct run behind a vented hood or the extra circuit an island outlet needs. A budget that lists allowances but holds no reserve, or omits hood ducting, is incomplete even if the total looks reasonable.
Permits and Systems That Change Your Scope
California state codes set building, electrical, plumbing, and energy standards. The city or county building department where the house sits decides which permits apply, reviews plans, and schedules inspections. Bay Area cities differ in forms, fees, and review steps, so requirements in one city do not transfer to the next.
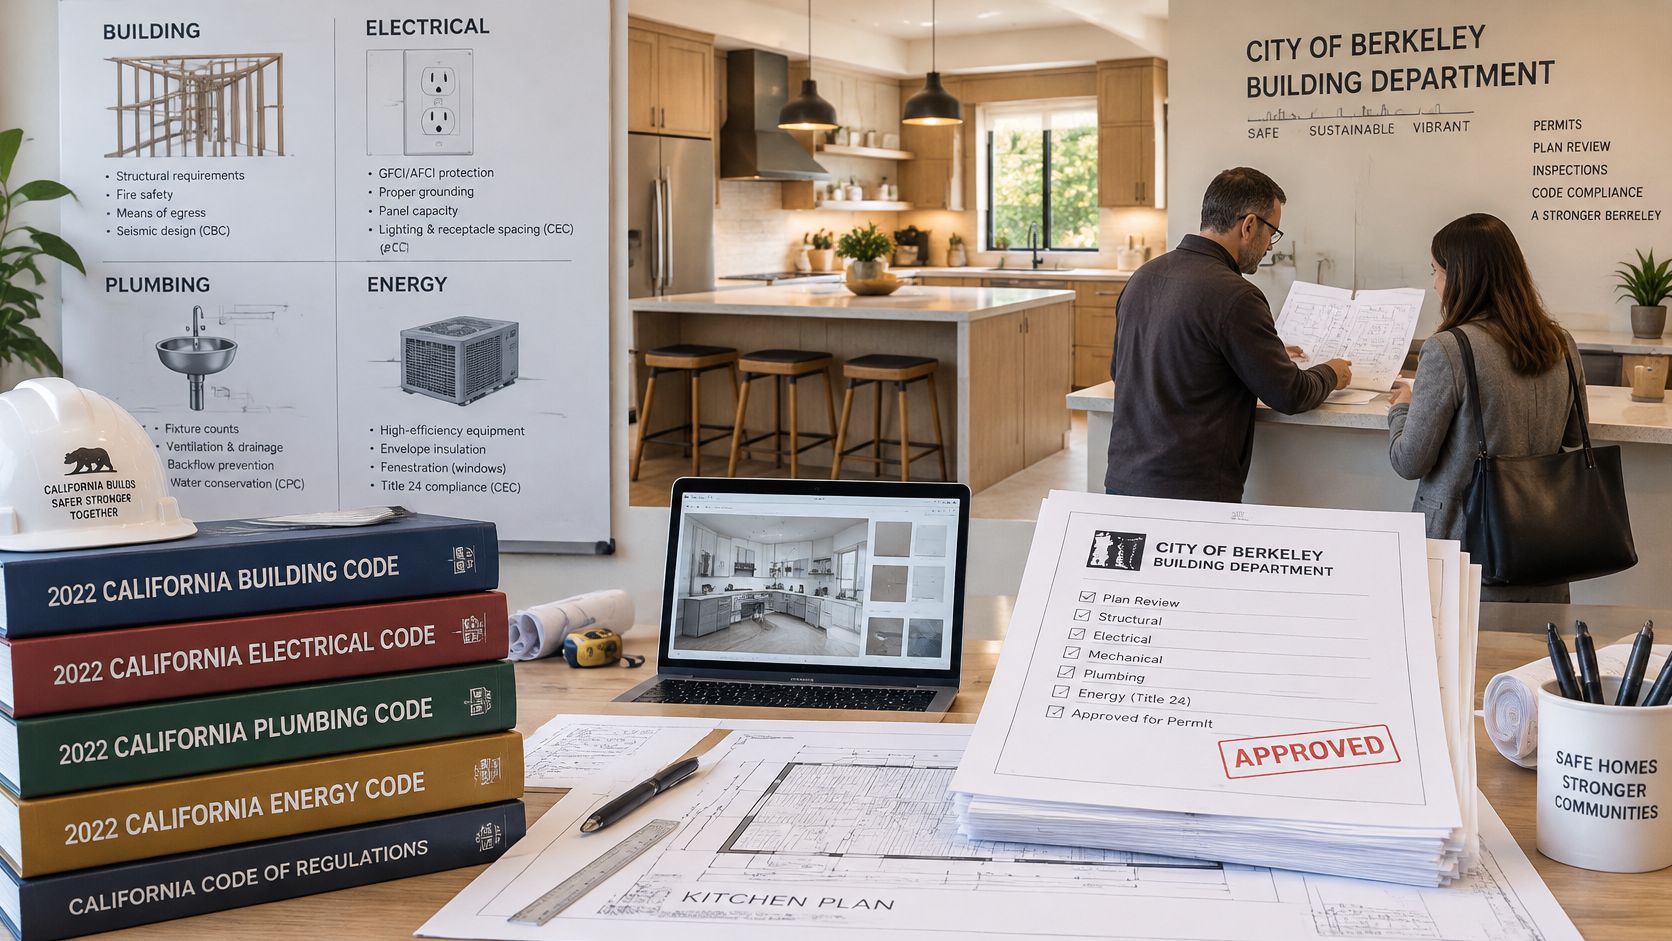
Most remodeling projects and all ADU projects require permits from the local building department. Cosmetic-only work may not, but confirm before assuming either way. The pattern worth watching is the change that looks cosmetic on paper. Moving a sink two feet pulls in plumbing. Swapping a recirculating hood for a ducted one pulls in mechanical and framing. Each of those trades carries its own permit, its own inspection, and its own rough-in deadline before walls close.
| Change | Trades involved | Likely permit trigger | Ask the city |
|---|---|---|---|
| Move the sink | Plumbing, possibly electrical | Plumbing permit likely if supply or drain lines move | Venting and drain slope requirements |
| Add island outlets or circuits | Electrical | Electrical permit; dedicated kitchen circuits and AFCI or GFCI protection where required | Panel capacity and circuit count |
| Replace recirculating hood with exterior vent | Mechanical and framing | Mechanical permit; exhaust must terminate outside at a minimum distance from doors and windows, often 3 feet, so confirm the required clearance with the city | Duct route, length and make-up air |
| Remove or move a wall | Structural, electrical, HVAC | Structural review and stamped plans; often a beam | Load path and engineer requirements |
| Replace cabinets in the same layout | Cabinetry | Often no structural permit; electrical permit may apply if layout changes | Whether any change needs review |
Ventilation and Electrical Triggers
Treat ventilation as an early mechanical decision, made while the layout is still on paper and before cabinets are ordered. For a typical range, the guidance summarized by the EPA remodeling and indoor air quality page points to approximately 100 cubic feet per minute of exhaust, and larger fans can depressurize a house and cause combustion-appliance backdrafting. The EPA recommends a combustion-safety test to determine whether non-sealed combustion appliances backdraft or spill combustion products indoors.
Don't route exhaust into an attic or crawl space. Document cooktop fuel, hood location, duct route, termination point, duct dimensions, electrical requirements, and whether replacement air is needed. The common failure is discovering after cabinets are installed that the desired hood can't be ducted effectively, which means cutting finished work or settling for a weaker fan.
Electrical scope expands the same way. The San Bruno 2025 Kitchen Remodel Handout explains that changing cabinet and countertop layouts can require an electrical permit, while kitchen receptacles generally need dedicated 20-amp small-appliance circuits, AFCI protection, and GFCI protection near sinks and dishwashers. GFCI protection cuts power when current leaks to ground, and AFCI protection guards against arc faults. San Bruno's handout illustrates the pattern, but each homeowner should verify requirements with the specific city.
Homeowners scoping a larger renovation alongside the kitchen can use an overview of remodeling a house to sequence rooms. Then ask the building department three questions. Which permits apply to this scope, is plan review required, and which inspections will be scheduled? Get those answers in writing before the estimate is signed, because each added permit changes the line items the bid has to cover.
How to Run the Build From Demolition to Final Inspection
Construction follows a fixed order because each stage depends on the one before it. Skipping ahead usually means reopening finished work.
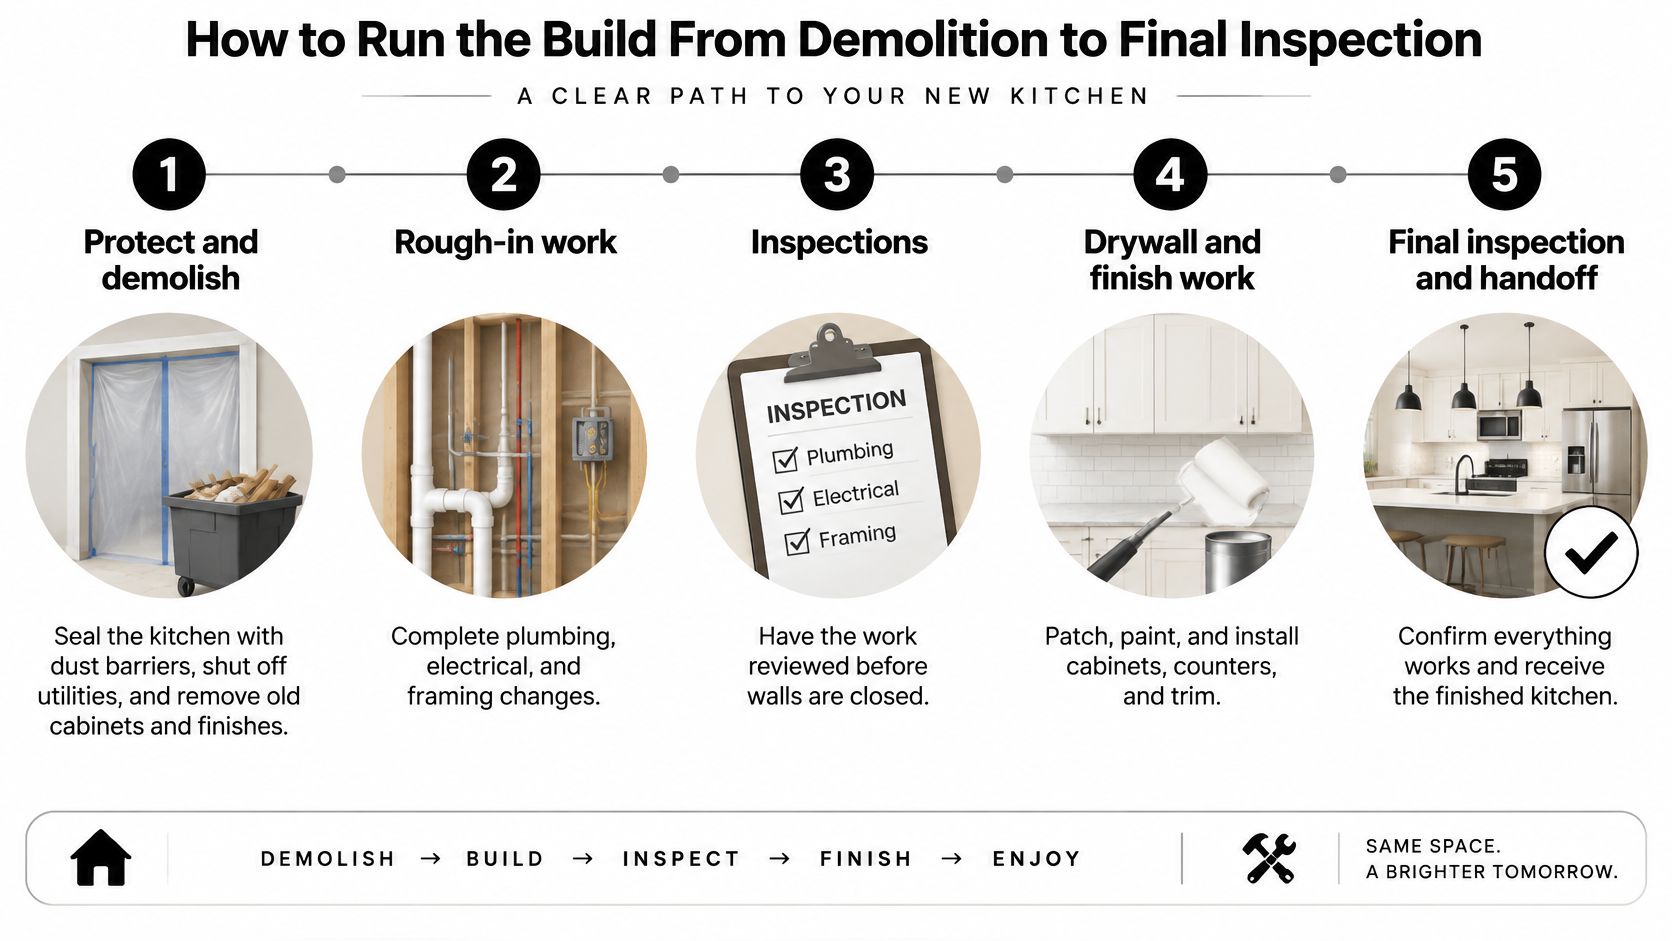
- Protect and demolish. The crew seals the kitchen with dust barriers, shuts off water and power, and removes cabinets, flooring, and finishes. Handoff point, the exposed framing and utilities get checked against the plan.
- Rough-in. Plumbers, electricians, and HVAC installers run supply lines, drains, wiring, and exhaust ducts inside open walls. Rough-in means the hidden systems are installed but not yet covered. The inspector checks this work before walls close.
- Insulate and hang drywall. After rough-in approval, insulation goes in, drywall is hung and finished, and walls are primed and painted. Closing walls before inspection is a costly error because the inspector can't verify hidden work.
- Install cabinets and template counters. Cabinet boxes are set level and fixed, then the fabricator templates countertops from the installed cabinets. Templating before cabinets are fixed risks counters that don't match the final position.
- Set finishes. Backsplash, flooring, and trim follow countertop installation. Sequence can shift slightly by flooring type, so confirm the order before materials arrive.
- Hook up and test. The range, dishwasher, hood, faucet, and lighting are connected. Hood airflow and exterior discharge get tested, plumbing is checked for leaks, and appliance clearances are verified against specifications.
- Final inspection and punch list. The city performs final inspection where required. A punch list is the written list of small defects, such as a misaligned drawer or paint touch-up, that the contractor corrects before final payment.
Timing Without False Precision
A kitchen or bathroom remodel usually takes 4 to 8 weeks. Treat that as an estimate, not a completion date. Countertop fabrication lead times, inspection scheduling, appliance delivery, and hidden conditions found after demolition set the pace.
Ask the contractor for a written schedule with its assumptions stated. Which selections must be final before demolition, when will cabinets arrive, and what happens if an inspection slot slips? The homeowner's role is clear. Confirm selections on time, keep access paths open, and approve every change order in writing before the changed work starts.
Avoid Costly Mistakes and Vet Your Contractor
The most expensive mistake is treating a change that moves wiring, plumbing, or ventilation as cosmetic, then skipping its permit and trade pricing. The cheapest-looking design change can become the priciest when it triggers several systems at once.
| Mistake | What it causes | Better move |
|---|---|---|
| Ordering appliances before confirming openings | Units that do not fit the cabinet space | Check model dimensions and clearances before ordering |
| Treating allowances as fixed prices | Selections that exceed the budget line | Name the product tier each allowance assumes |
| Verbal changes without price | Disputed cost and schedule | Require written change orders with price and schedule impact |
| Pricing an older house with no reserve | Concealed conditions with no money set aside | Raise contingency and inspect hidden areas early |
Carry three checks forward from the earlier sections and put them on this same list: freeze the layout in writing before rough-in, route and verify the hood duct during design rather than after cabinets are hung, and run every scope change past the city for a permit determination. Those three traps live upstream, but they cost the same way the mistakes above do, as reopened trade work or unpriced commitments.
Before demolition, photograph walls and utilities and keep a labeled map of shutoffs and circuits. Photos of open walls help later when a homeowner needs to find a pipe or wire without cutting drywall.
Questions to Ask Any Contractor
- Permits and inspections: Who pulls permits and schedules inspections, and who meets the inspector on site?
- Layout process: Who prepares the layout, and are at least three options shown before pricing?
- Allowances and contingency: How is each allowance defined, and how is contingency held, approved, and billed?
- Change orders: How are changes priced, and must approval be written before work proceeds?
- Trades: Which workers are employees and which are subcontracted, and who supervises them daily?
- Schedule risk: What could extend the timeline, and how are delays communicated and handled?
The allowance question deserves a follow-up. Ask the contractor to state the product tier each line assumes, a mid-grade cabinet versus a custom build, a stock tile versus a natural stone, because a low allowance hides cost exactly where a vague change order does.
Bring a first-meeting packet. Include a measured floor plan, photos of walls and utilities, a budget range, the chosen scope tier, must-have features, and any HOA or historic-district constraints. A prepared packet, like the items in this home remodeling checklist, gets more accurate preliminary pricing than a verbal wish list.
9Builders offers free calculators and estimators, the ADU Cost Calculator, Room Addition Estimator, ADU Rental Income, Remodel ROI Calculator, Permit Fee Estimator, and Timeline Estimator, which can help frame early budget and schedule questions before a site-specific estimate.
Homeowners weighing a kitchen project against adding living space can compare options in the detached ADU versus garage conversion cost guide. That comparison clarifies whether the better investment improves the existing kitchen or creates a separate dwelling, and it keeps the kitchen scope honest.
Vet the process behind the price. A contractor who explains permits, allowances, and change orders clearly before signing is easier to work with after demolition.
If the next step is sorting a cosmetic refresh from a full reconfiguration, 9Builders can review the layout, systems, and permit path for a San Jose or Bay Area kitchen before money is committed to cabinets or demolition. Contact 9Builders to discuss the property, project goals, and budget, and to turn the chosen scope into a written plan with realistic cost and schedule expectations.