En Suite Bathroom Remodeling: Planning, Layout and Costs
En suite bathroom remodeling planning for Bay Area homes: layout options, ventilation, waterproofing, permits, and estimated costs and timelines.
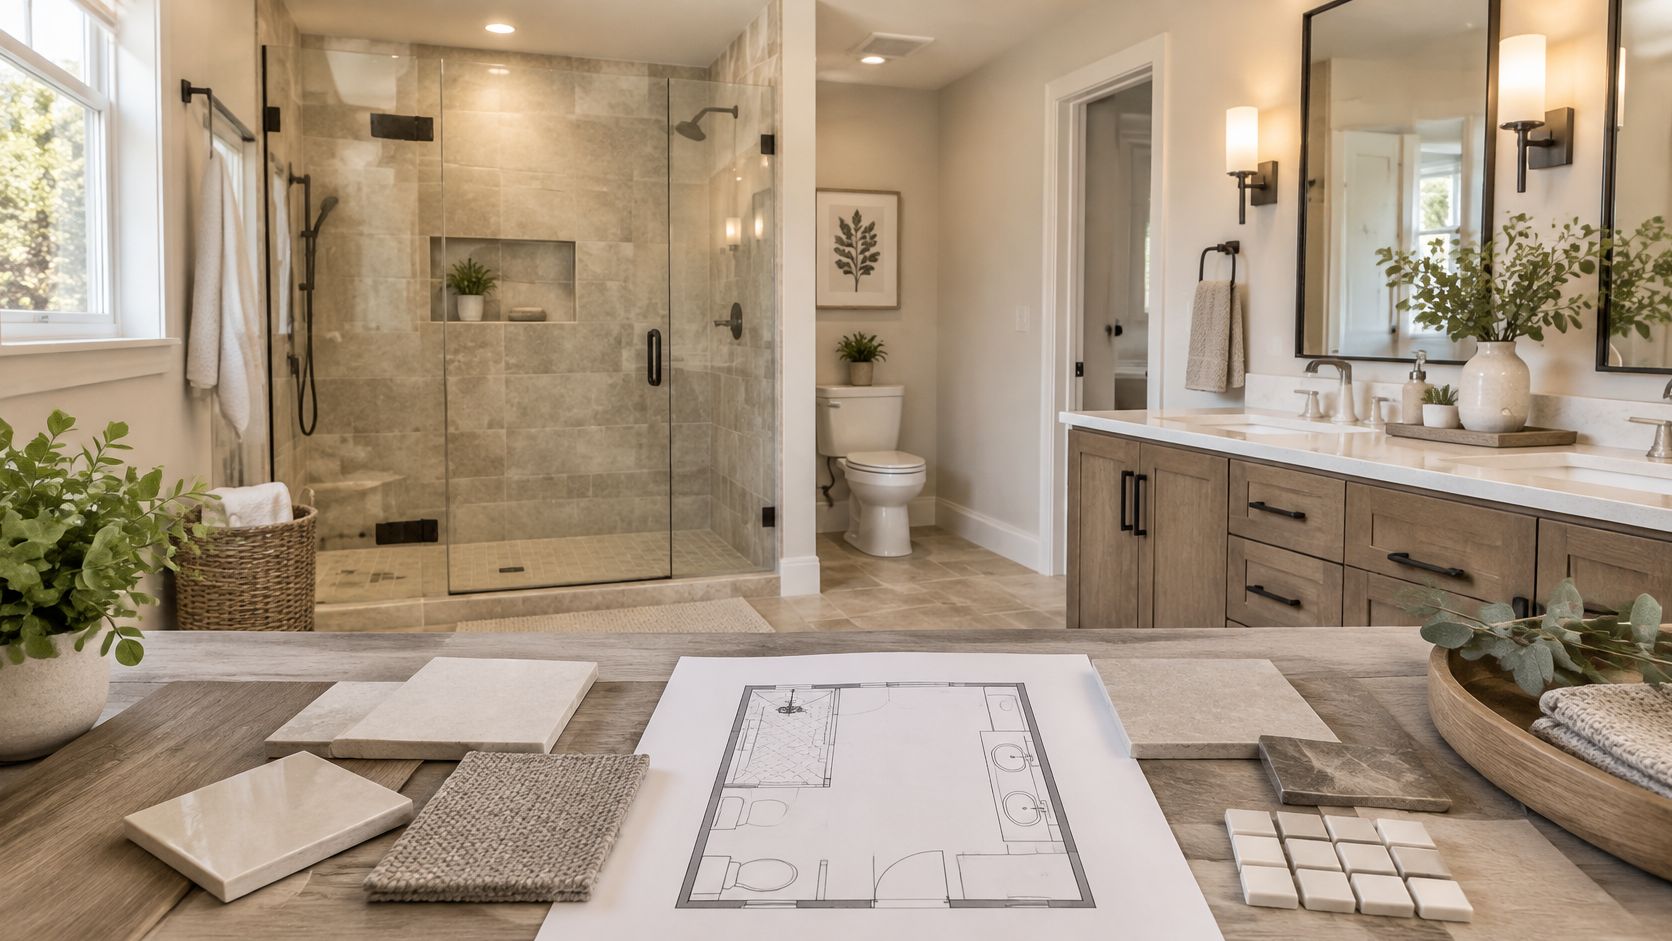
You've lived with the same bathroom for years. The shower door sticks, the fan runs but the mirror still fogs, and one sink is one too few on a weekday morning. Then a parent visits for a month, or a listing agent walks through, and the project moves from someday to this year.
That's when the questions arrive together. Does the layout have to change? What does a permit involve? Why is one bid half the price of another, and what is a mud bed anyway?
An en suite is a small room holding a lot of systems: supply and drain plumbing, a vent path to the outside, waterproofing under the tile, electrical for lights and the fan, and framing that may or may not cooperate. Settle those five before you shop for tile, and the project gets cheaper and calmer. Skip them, and the finishes end up hiding problems that were built in.
Scope, Budget and Timeline at a Glance
| Scope | Typical work | Reference cost |
|---|---|---|
| Refresh within existing layout | Vanity, fixtures, lighting, flooring, paint | National minor-remodel median $8,000 (2022) |
| Shower or tub replacement | New shower base, waterproofing, valve and drain work | National major-remodel median $20,000 (2022) |
| Layout change or footprint expansion | Moved plumbing, new framing, added ventilation, possible structural work | Above the $20,000 major-remodel median, priced from drawings |
| Accessibility upgrades | Curbless or low-curb shower, blocking, grab bar backing | Feature-driven, since blocking and a low-curb base cost far less than a curbless rebuild |
Most en suite projects land in one of those rows, and the row decides nearly everything else: how long the room is unusable, which trades you need, and whether a permit is part of the job.
Footprint changes are more common than the "just replace the tile" conversation suggests. The 2023 U.S. Houzz Bathroom Trends Study, which surveyed 1,921 homeowners planning or completing a primary en suite or full guest bathroom renovation, found that 77% kept the existing footprint, while 22% enlarged the primary bathroom and 17% added square footage through a home addition. Shower size grew for 61% of homeowners, and after remodeling 59% of bathrooms measured at least 100 square feet (Houzz).
Spending moved with that ambition. The same study puts the median cost of all bathroom remodels at $13,500 in 2022, up 50% from $9,000 in 2021, with major remodels at a median of $20,000 and minor remodels at $8,000. Read those as national medians from 2022, not as Bay Area quotes. Peninsula and South Bay labor, permit fees and inspection timelines put local numbers higher for most scopes.
Practical rule: the bid you can compare is the one that lists exclusions. A cheaper number that leaves out waterproofing, the permit, or disposal isn't a cheaper project, it's a partial quote.
Once demolition starts, a bathroom usually takes 4 to 8 weeks, which is a planning range rather than a promise. A layout change adds design time, a permit cycle and inspection scheduling; a fixture refresh in the same spot tends to run at the faster end. Ask each bidder for a schedule tied to your specific scope instead of accepting a generic figure.
What an Estimate Should Include and Exclude
- Demolition and disposal. Haul-away, the dumpster, and protection of the path from the front door to the room.
- Rough plumbing and electrical. Moving a valve or drain, adding a circuit for a heated floor or a new fan, and the inspection that follows each.
- Ventilation. A fan sized for the room and ducted outdoors, not a recirculating unit.
- Waterproofing and flood testing. The membrane system and the pan test listed as line items, not buried inside the tile price.
- Fixtures and finishes. Whether the contractor buys them and what allowance the bid carries if you haven't chosen yet.
- Permits and contingency. Who pulls the permit, and how hidden rot or old wiring gets priced once the walls open.
If the row that fits is footprint expansion, the budget conversation shifts onto square footage, and this breakdown of home addition cost per square foot shows how that math is built.
Before requesting bids, answer one question for yourself: which row matches the room you have today?
Layout Choices That Fit Your Footprint
| Layout option | Footprint change | Best for | Main trade-off |
|---|---|---|---|
| Keep existing footprint | None | Fast swap of fixtures and finishes | Limits shower size and storage |
| Borrow from an adjacent closet | Small addition | Adding a usable shower or double vanity | Loses closet storage, and the plumbing route must be checked |
| Expand into a bedroom | Medium | Larger suite with a walk-in shower | Reduces bedroom size and may need new framing |
| Home addition | Large | Primary suite with a new bathroom | Highest cost and longest schedule |
The first decision isn't the vanity. It's how much of the room you're willing to rebuild, because that answer sets what the plumber and the framer have to do.
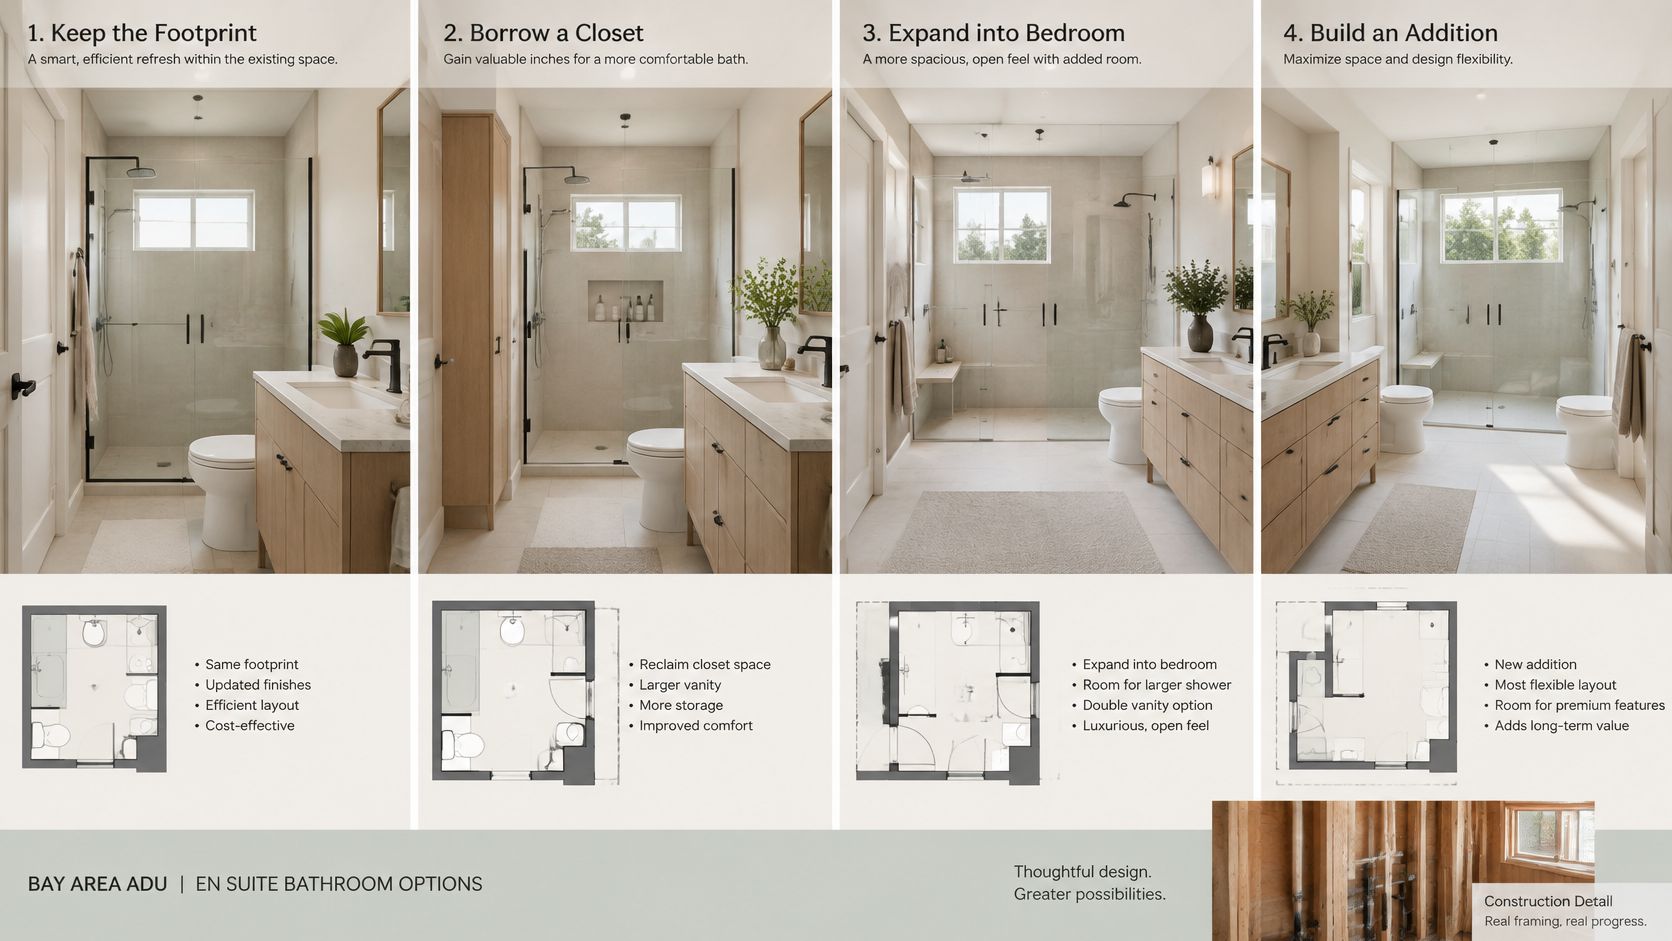
Keeping the footprint keeps the drain where it sits, which is the cheapest path and also the most limiting. Borrowing from a closet opens real options for a larger shower or a double vanity, but the vent route and drain slope have to be confirmed before anyone swings a hammer, because a closet floor rarely lines up with the fixture you want.
Expanding into a bedroom buys space at the cost of the bedroom, and it usually brings framing and a header into the scope. A home addition gives the most freedom and takes the longest, with design, structural work and permitting stacked in front of construction. Each step up in the table adds weeks and dollars, so pick the smallest version that solves the actual problem.
Errors That Waste Floor Area
The most common plan mistakes in compact suites aren't exotic. They're an oversized bathroom that leaves too little room for the shower and storage, a centered bathroom that pushes its door into the hallway traffic, and long passageways that eat the usable floor in a small room.
Door type matters more than people expect. A standard swing door claims a quarter circle of floor every time it opens, and in a tight room that's the only place a towel bar or a bench could go. A pocket door frees that area if the wall has room for the cassette; a sliding barn door frees it more cheaply but doesn't seal light or sound the way a framed door does, which matters in a room attached to a bedroom.
Get at least three layouts drawn side by side before committing. Compare them on bedroom separation, vanity length, shower footprint and storage, and pick the one that solves the most of those at once.
- Measure and mark. Note the room dimensions, the drain and vent locations, and the door swing before any design starts.
- Set the toilet first. Its drain location fixes much of the plan, along with the clear floor space in front of it.
- Place the shower valve before walls close. A valve in the wrong wall is expensive to relocate later.
- Confirm rough-in dimensions. Toilet and valve rough-ins ordered for the wrong measurement force rework, so check the manufacturer's spec against the framed opening.
Accessible Features You Can Plan Now
The common assumption is that an accessible bathroom means grab bars everywhere and a room that feels clinical. The evidence points the other way.
AARP's 2024 Home and Community Preferences Survey found that 90% of adults age 65 and older would prefer to remain in their current homes, and among those expecting to stay, 43% said their homes would need accessibility modifications. Of that group, 72% identified the bathroom as an area requiring changes (AARP). The bathroom is where the work is needed, and it's also the room where good design can hide the work.
Demand is already showing up in remodeling decisions. A 2025 U.S. Houzz study found that 68% of homeowners considered special needs in a bathroom project, up four percentage points year over year, while 47% were planning for needs expected five or more years out. The features chosen most often were grab bars at 61%, nonslip flooring at 55%, low-curb showers at 52% and curbless showers at 28% (Houzz).
Practical rule: build in what's expensive to add later, and leave what bolts on. Blocking, door width, a level threshold and a shower valve reachable without standing in the spray belong in this phase. Grab bars and a seat can wait.
What's worth deciding now: clear floor space at the toilet and shower, a door wide enough for a walker where the room allows, and two-by blocking behind the shower and toilet walls so grab bars can be anchored into framing instead of drywall anchors later. A low-curb shower handles most needs with a modest step; a curbless shower is worth the extra structural and waterproofing work when a wheelchair or a walker is a real possibility, and not before.
Add slip-resistant flooring, lighting at the vanity and inside the shower, controls within easy reach, and a layout that lets someone assist without standing in the doorway.
AARP's guidance puts a tub removal with a shower seat and grab bars in the $10,000 to $15,000 or more range depending on scope. Treat that as a planning range, not a quote for your property. The decision rule is simpler than the feature list: match features to the ages in the household, how long you expect to stay, and the floor area you have.
Permits, Legalization and Inspections by Project Case
| Project case | Likely permit question | Where to confirm |
|---|---|---|
| Fixture swap with no moved plumbing | Whether any plumbing or electrical permit is needed | City building department, against current state and local rules |
| Moving a toilet, shower or drain | Plumbing permit and drain-vent review | City building department and the locally adopted plumbing code |
| New or enlarged bathroom in an addition | Building permit, setbacks, structural review and energy documents | City planning and building departments |
| Unpermitted bathroom or ADU | Legalization, as-built plans and required corrections | City ADU permit service and state ADU law |
California sets the statewide codes and ADU law. Each city and county then adopts and administers its own forms, checklists and inspection schedules, so a process that works in San Jose doesn't automatically transfer to Campbell, Santa Clara or Palo Alto. Confirm the rule with the city that will inspect the work.
San Jose's residential application materials require a site plan showing property boundaries, adjacent roads, fire access, the locations of dwelling units, setbacks to structures, lot coverage and the measurements behind each of those numbers (City of San Jose). A site plan is the drawing reviewers use to compare your proposal against the parcel and the zoning rules that apply to it.
When the Work Is Already There
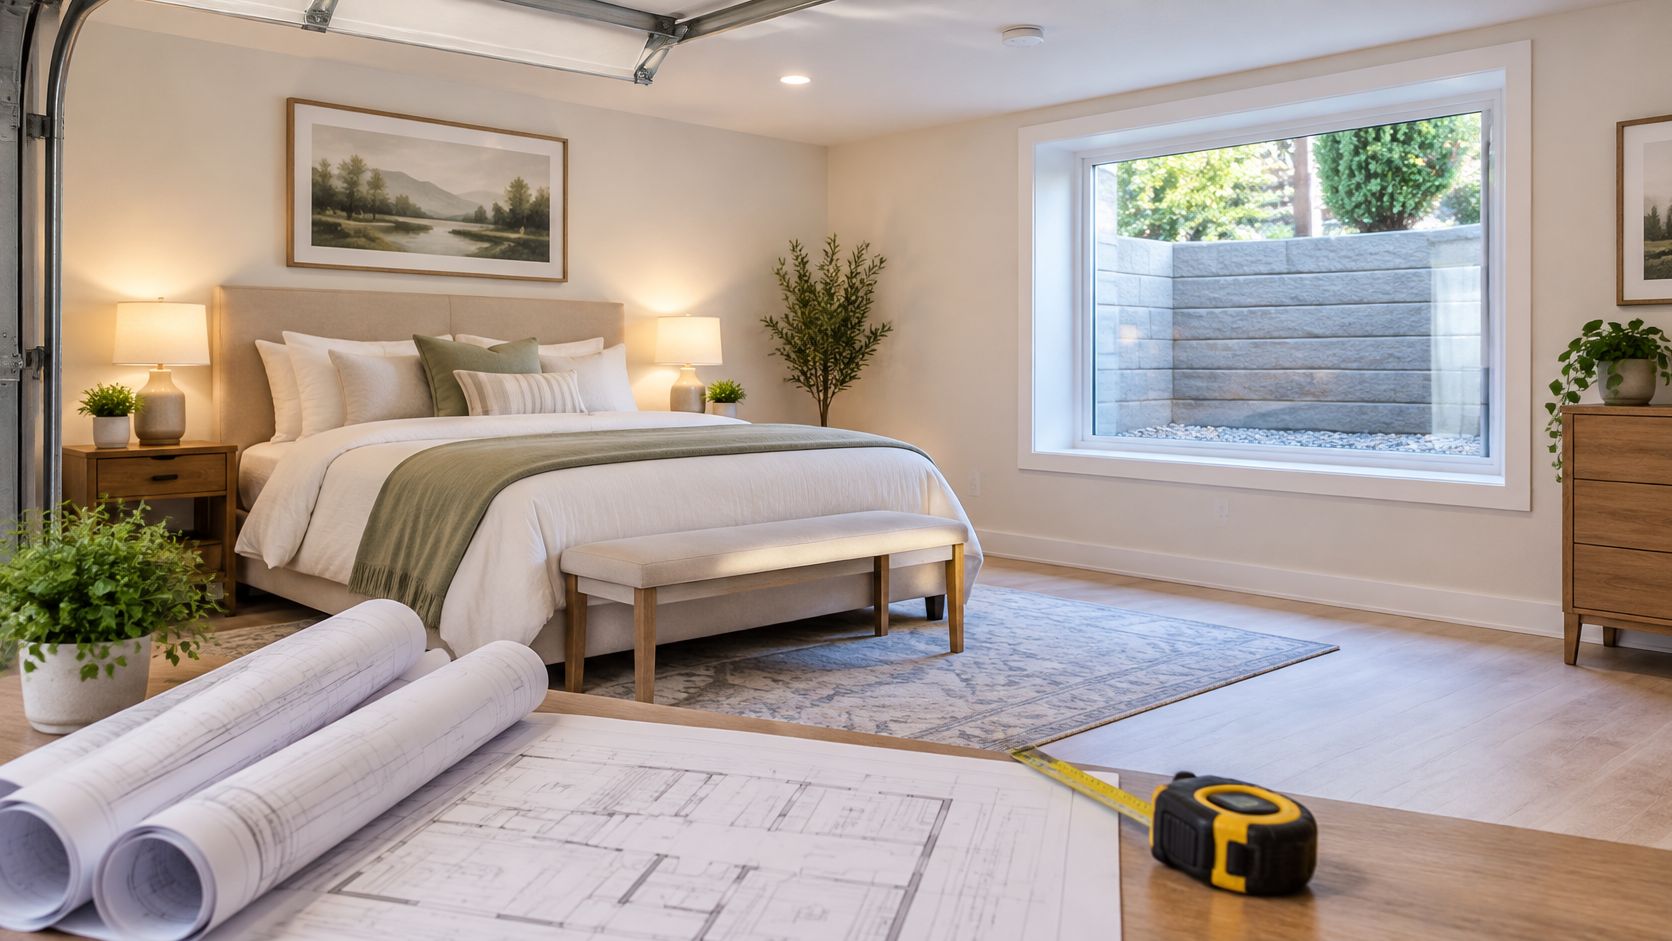
For an unpermitted bathroom or a garage conversion, accurate as-built drawings do more than satisfy a paperwork step. They record what is on the property so the city can evaluate setbacks, access and unit locations, and so corrections can be scoped and priced instead of discovered mid-inspection.
State ADU law also shapes what a city can ask for. California limits local parking requirements to no more than one space per ADU or bedroom, whichever is less, and restricts when parking can be required at all for many units near transit or created through a conversion (California ADU Handbook). That matters when a garage conversion is part of the plan.
Expect two inspection stages on a bathroom: rough plumbing and electrical before the walls close, then a final inspection after tile and fixtures. No contractor can guarantee approval or a completion date, because both depend on the city's review and on what demolition finds. This walkthrough of the bathroom remodeling process shows where each stage falls.
Ventilation and Moisture Control That Protects the Room
Showering puts water vapor into the air. If that humid air stays in the room, it condenses on the coldest surfaces, which are usually the mirror, an exterior wall, the ceiling and the grout joints, and that moisture feeds mold and breaks down materials. The U.S. Environmental Protection Agency recommends keeping indoor relative humidity between 30% and 60% and venting bathrooms to the outside during moisture-generating activities, as set out in this California residential bathroom remodel guide.
The same guidance calls for mechanical exhaust in any room with a bathtub or shower at a minimum of 50 cubic feet per minute (CFM) for intermittent operation or 20 CFM for continuous operation, with the duct terminating outdoors and a humidity-control switch so the fan responds to moisture instead of relying on memory. CFM is the volume of air a fan moves per minute, and it's the number that matters, not the sones rating on the box.
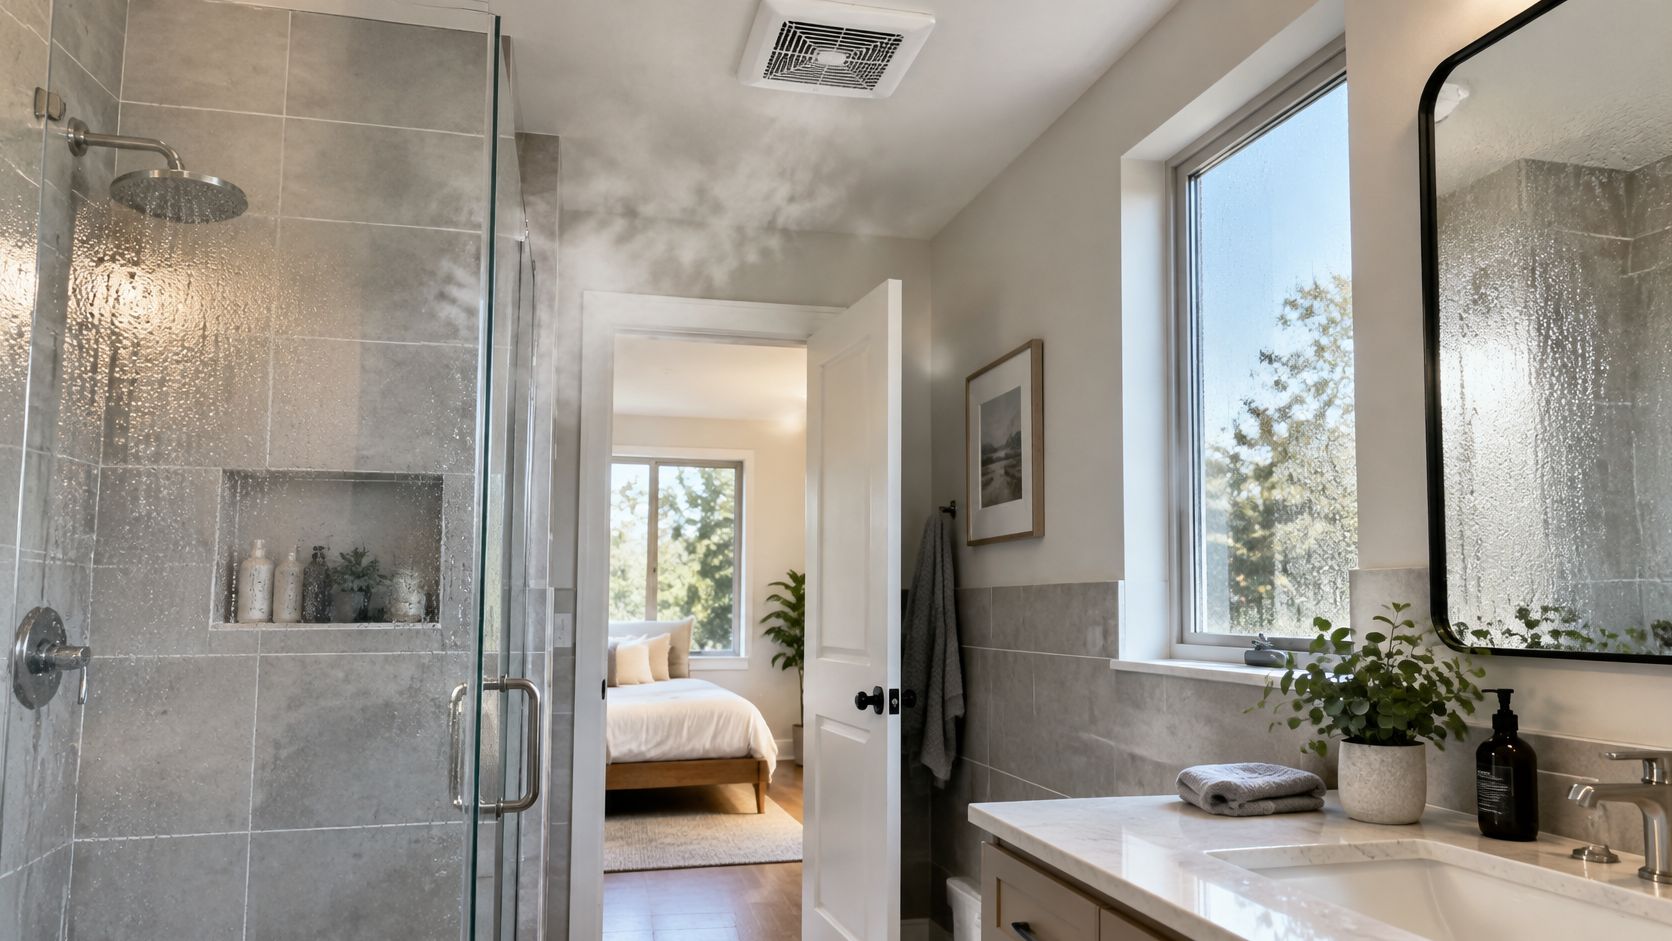
A quiet fan isn't automatically a strong one, and a strong fan on a bad duct run moves almost nothing. Airflow depends on the whole path: how many feet of duct, how many bends, where it terminates, and whether the room has a way to draw replacement air in. A fan ducted into the attic instead of through the roof dumps that moisture into the framing, and a fan starving for makeup air through a tight door will pull against itself. A door undercut or a transfer grille gives it a path.
A Commissioning Checklist
- Confirm outdoor termination. Walk outside and verify the damper opens where the duct ends, not in the attic.
- Check the backdraft damper. It should close when the fan stops so outside air doesn't come back in.
- Test the humidity switch or timer. Run it and confirm it starts and stops the fan on its own.
- Place the grille near the shower. Moisture collects fastest at the source, not across the room.
- Insulate ducts in unconditioned spaces. A cold duct condenses inside itself.
Older Bay Area homes often limit the retrofit. A ceiling with no clear path to the roof, a second-floor bathroom over a finished room, or a wall with no cavity for a duct can force a different fan location. Confirm the route before finishes go on, because after the tile is set the options narrow sharply.
How to Build a Waterproof Shower and Floor
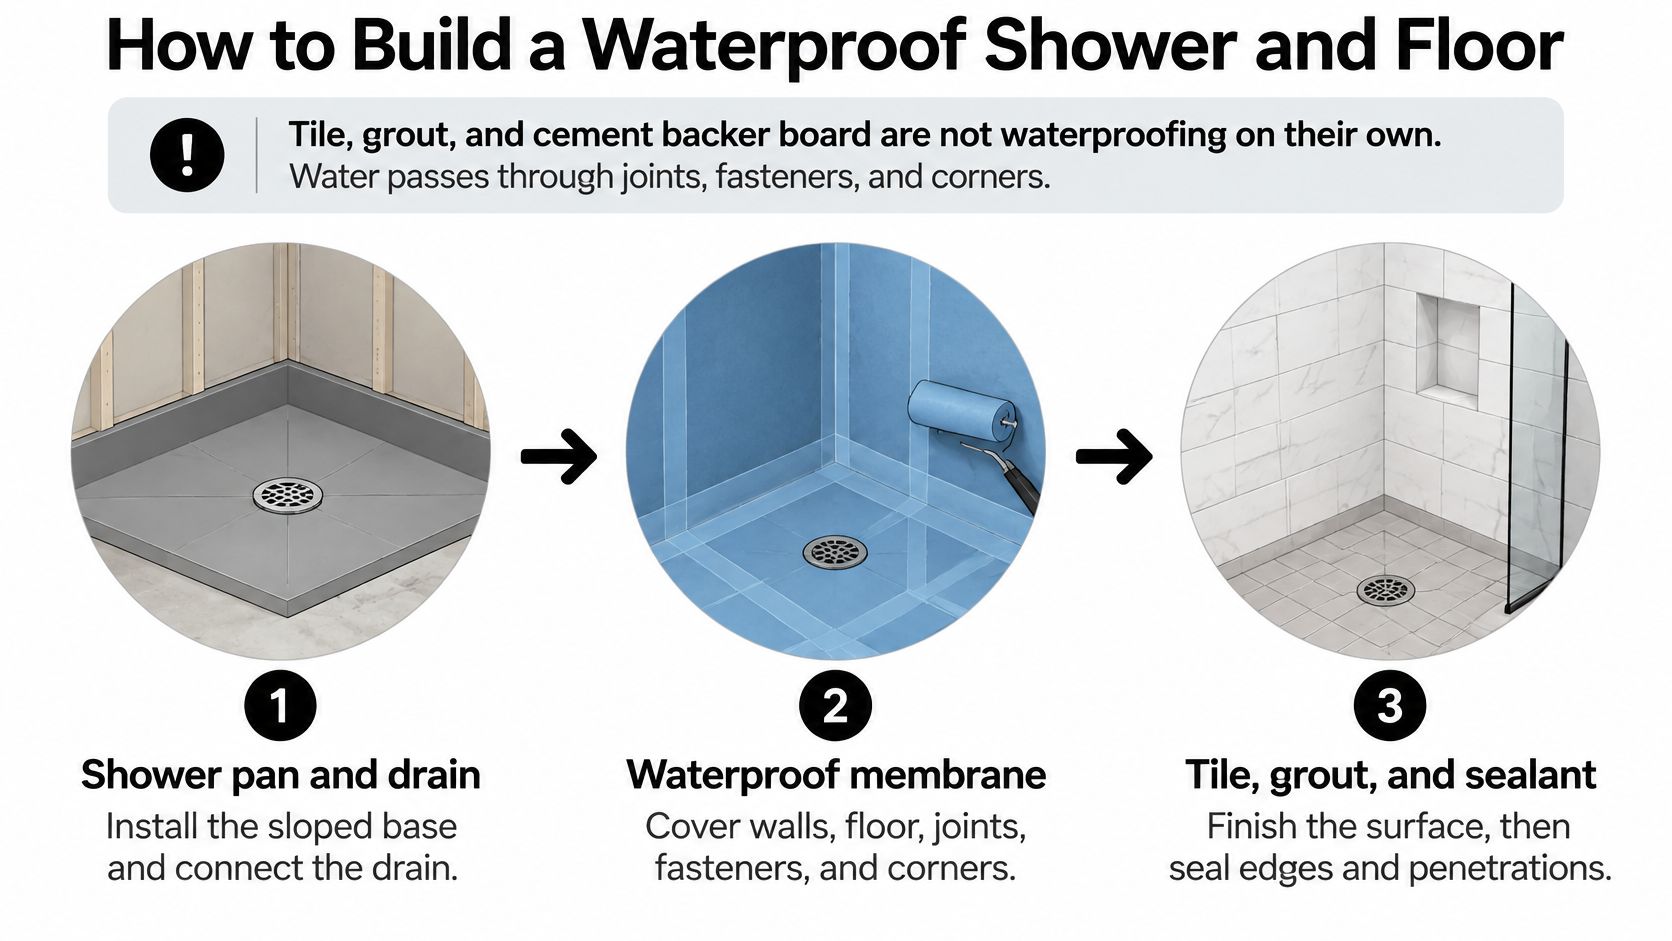
Tile, grout and cement backer board are not a waterproofing system. Water passes through grout lines, around fastener heads, into corners and through the transitions where a shower meets a bathroom floor, and unless a continuous membrane redirects it toward the drain, it ends up in the framing and the subfloor (EPA mold guidance).
- Document the substrate after demolition. Note rot, damaged framing and the existing drain height. Skipping this step means discovering a soft joist after the pan is built.
- Coordinate the drain with the finished floor elevation. The shower floor needs to slope toward the drain, and a drain set too high leaves standing water at the perimeter.
- Choose one membrane system, sheet or liquid-applied. Mixing products from different manufacturers at a joint only works when both of them say so in writing.
- Run the membrane continuously. Shower floor, walls, niche, curb or bench, and every plumbing penetration should be one connected assembly, with no gap at an inside corner.
- Flood-test the pan before tile. Fill it, hold the water, and look for loss. A pan that fails now costs a day; a pan that fails later costs the room.
- Tile, grout, then seal the transition. The joint where the shower meets the bathroom floor is where failures stay hidden until the flooring swells or an odor appears.
- Dry damp material within 24 to 48 hours and repair leaks promptly. That's the EPA's moisture-control advice, and it applies to a slow supply leak behind a wall as much as to a spill.
Write the membrane brand and the flood test result into the job file. It takes two minutes and settles most arguments later.
What a Finished Shower Should Show
A sloped floor that drains fully without a puddle, sealed transitions at the curb and the bathroom floor, a documented flood test from before the tile went down, and an access panel or a plumbing wall that backs onto a closet or hallway so a future repair doesn't require demolition. Confirm each of those before the final payment, not after.
Confirm Your Scope With a Contractor Before You Sign
Seven questions separate a bid you can rely on from a number on a page.
- Does the scope match the footprint? Ask how the plan accounts for the existing drain location and the ventilation route, not just the fixtures.
- What's in and what's out? Demolition, disposal, rough plumbing, rough electrical, the membrane type, flood testing, ventilation, fixtures, finishes and permits should each be stated either way.
- How are hidden problems priced? Ask for the process for rot, old wiring or a failed drain discovered after demolition, including how the change is approved and billed.
- Who pulls the permit? And who meets the inspector at the rough stage and the final.
- Will several layouts be compared? A single plan gives you nothing to react to.
- What's the schedule and what moves it? Permit review, inspection availability and material lead times are the usual suspects.
- Which inspections happen, and who attends? Rough plumbing and electrical before walls close, final at the end.
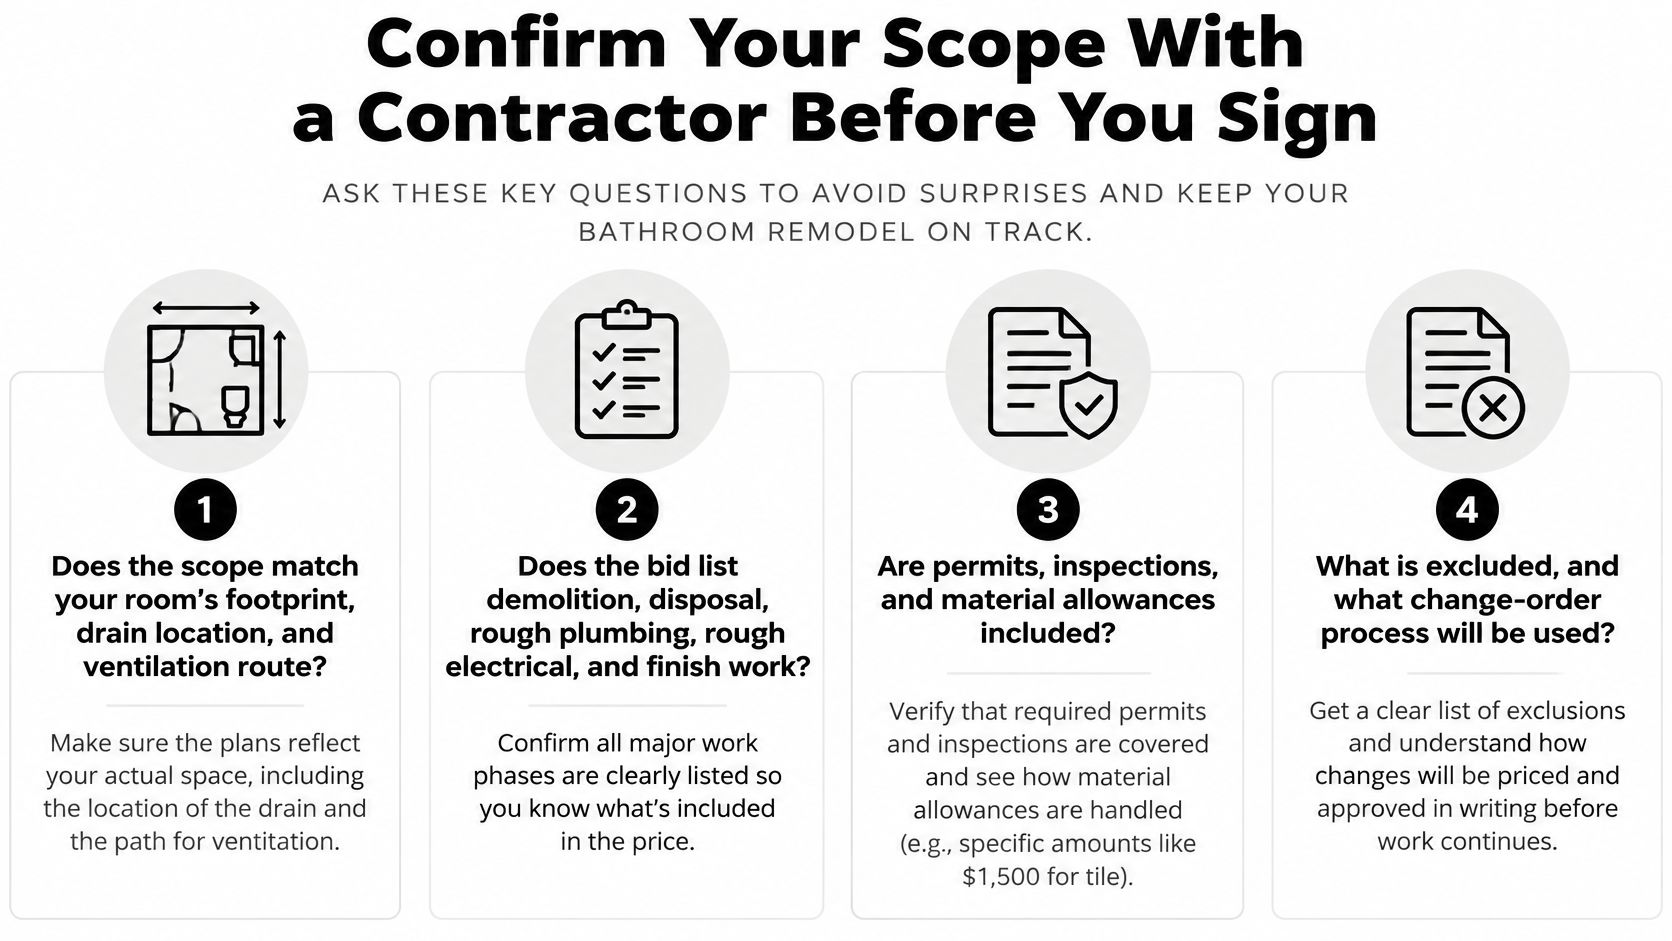
Four questions carry most of the risk here: what's excluded, how hidden damage is priced, who owns the permit, and what the schedule assumes.
Estimates aren't guarantees. Cost moves with access to the room, hidden damage, finish selections and corrections the city asks for, and dates move with permit review and lead times. A contractor who explains those variables up front is telling you something useful about how the rest of the job will run.
9Builders is a local ADU construction and remodeling company serving San Jose and the surrounding Bay Area, working from design and permitting through construction and final inspections, including bathroom remodeling. The team presents at least three layout options so homeowners can compare trade-offs such as bedroom separation, shower size and storage instead of reacting to a single plan. For homeowners planning a larger primary suite, the same approach covers garage conversions and ADU legalization when the property has room to add living space.
Bring the room measurements, the list of what's failing and a rough budget, and ask for a scope written in the same detail as the table at the top of this article. That conversation is worth having before you sign anything.
An en suite remodel goes better when the moisture, drainage and accessibility decisions are made before the tile is chosen, and that's the order 9Builders works in on Bay Area bathroom projects, from design and permitting through construction and final inspections. The same team handles detached and attached ADUs, garage conversions and ADU legalization when a bathroom project turns into a larger plan for the property. Visit 9Builders to discuss your property, project goals and budget.